Tab
The Tab object allows the user to open different screens (Graphics) inside a Tab Object. It can be used to organize a complex set of screens.
Properties:
You can select (or drag and drop) from left to right, which screens you want to be added to the Tab Control object. You can also configure its width and height.
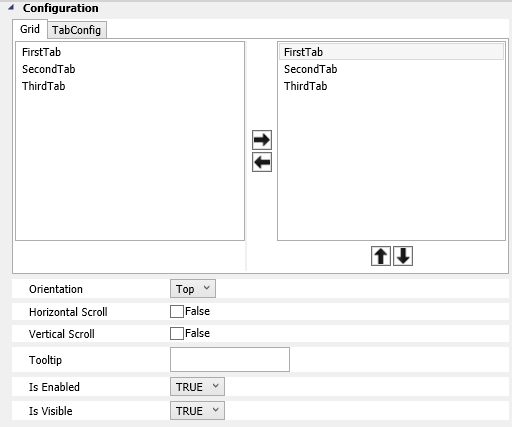
In this example, the object is configured with 3 screens "FirstTab", "SecondTab" and ThirdTab". If these screen sizes (width and height) are greater than the objects' size, during Runtime the horizontal and vertical scroll bars will appear. But you can disable these scrolls if you want to in the Properties Window. The tip is to draw the width and height of these 3 screens smaller than the Tab. Even if they are half of the objects size, they will be placed in the center during the Runtime.
To create a new Tab in the Graphics Document:
1. Click the "Tab" button in the Ribbon.
2. Place the mouse pointer where you want to create the Tab.
3. Click to create the new Tab.

Example 1: Configuring an application with Tab Control.
. Create 4 new Graphics (screens) as below:
. Name: FirstTab
. Screen Width = 300
. Screen Height = 300
. BackGround Color = White
. Name: SecondTab
. Screen Width = 300
. Screen Height = 300
. BackGround Color = Red
. Name: ThirdTab
. Screen Width = 300
. Screen Height = 300
. BackGround Color = Black
. Name: TabScreen
. Screen Width = 400
. Screen Height = 400
. Insert a TabControl
. Tab Width = 310
. Tab Height = 310
. Remember its name in the Properties Window

. While in the Properties Window, click the TabConfig tab. Select from left to right "FirstTab", "SecondTab" and "ThirdTab" as the following image:

. Set the TabScreen as the startup screen.

. Run
the Application (F5) and see the results.
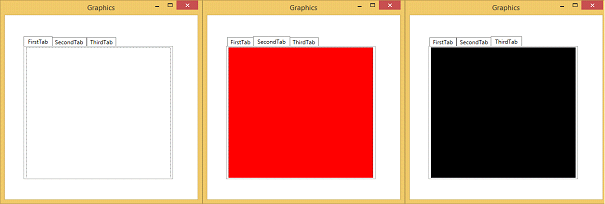
. In the RunTime, the TabControl will load the 3 screens configured in the properties window.

. Now open each screen using the tabs and see the result.
Example 2: Add scripts to change its configuration during RunTime.
. After doing all the steps in Example 1 above, add some changes as described below.
. Open the TabScreen.
. Insert 4 Buttons and 1 Label as in the following image:
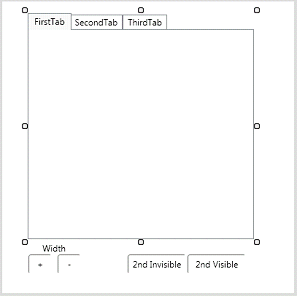
. Label = "Width"
. Button 1
. Text = "+"
. MouseUp Event:
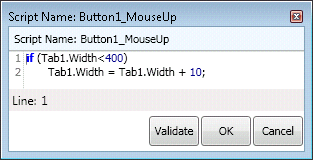
. Button 2
. Text = "-"
. MouseUp Event:
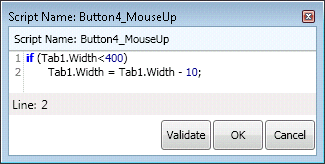
. Button 3
. Text = "2nd Invisible"
. MouseUp Event:
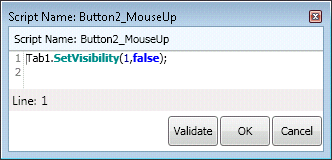
. Button 4
. Text = "2nd Visible"
. MouseUp Event:
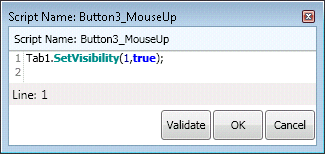
.
Save the Screen and Run the Application (F5).
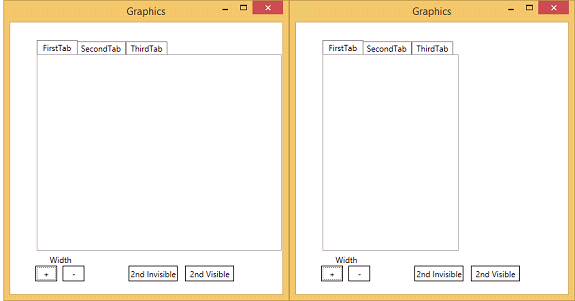
. In the RunTime, the TabControl will load the 3 screens configured in the properties window.
. Now let's test the width. Click the "+" button and the tab's width will increase, the "-" button will decrease.
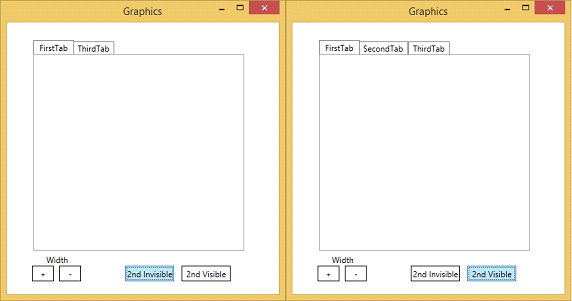
. Now click the "2nd Invisible" button and then "2nd Visible" button. The 2nd tab (index 1) will be hidden and appear again.
Property List:
Info
. Name
. Size
. Location
. ZIndex
Configuration
. ToolTip
Functions
. .FontColor
Brushes
Security