Alarm Object
The Alarm Object is the interface that will display the alarms being triggered, normalized and acknowledged. It can be an online, history, event or event and history alarm.
In this document you will be able to differentiate online, history and event alarms, understand all the steps to configure each type and you will be introduced to its alarms flow.
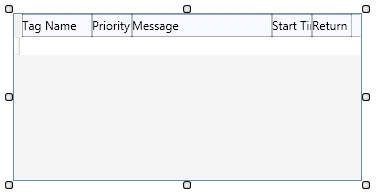
For all types of Alarms (Hi, Lo, etc.), the flow is the same:

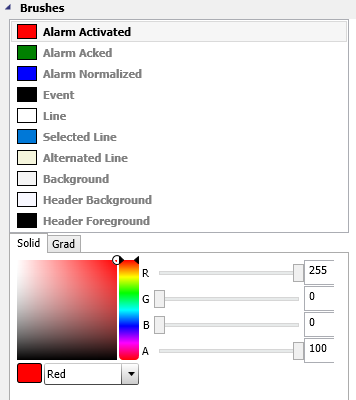
*The colors displayed by the Alarm Object can be customized. The image above shows the default colors.
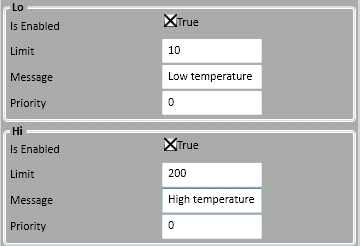
So, as an example using an online alarm, the user configured a temperature tag to alarm (LO) if the temperature is lower than 10 and to alarm (HI) in case its value is greater than 200. The sequence of alarms while changing its value from 0 to 20, to 210 and back to 40 will be:
1. Running the application will already trigger the LO alarm as its value is lower than 10.
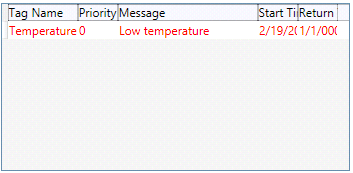
2. If the user doesn't acknowledge the alarm by double-clicking it before it normalizes, the color will now be blue as configured.
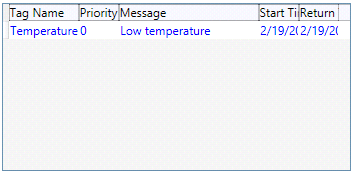
3. Now if the temperature value goes up to 210 degrees, the HI alarm will be triggered. The LO alarm is kept normalized but not acknowledged.
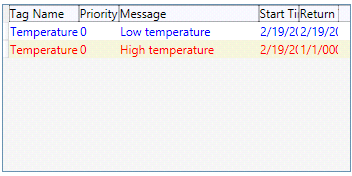
4. Now lets see 2 different paths:
4.1. First the user does not acknowledge the HI alarm and its value normalizes from 210 to 40.
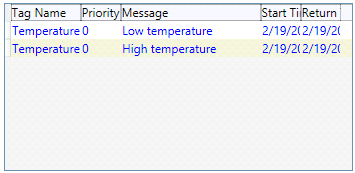
If the user acknowledges both alarms (after normalizing and not being reactivated), the alarms will be removed from the alarm object.
4.2. Second path is the user acknowledging the HI alarm before it normalizes.
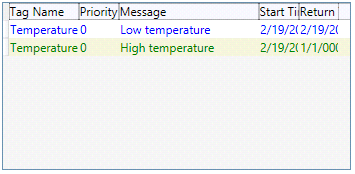
When the HI alarm normalizes from 210 to 40, it will be removed from the alarm object.
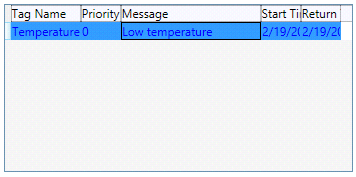
5. If this alarm was a history type, it would have stored all the alarm transitions and the user would be able to see what time each alarm was activated, acknowledged and normalized.
Types of Alarm:
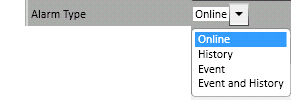
a) Online Alarm

Description:
The Online Alarm only displays the current triggered alarms. If the same alarm for the same tag is triggered twice, the online type will not show it.
The last alarm state is removed from the Alarm Object if it was Normalized and Acknowledged. If one of them was not acknowledged yet, the alarm will still be there.
The user can only acknowledge an alarm using the Online and double-clicking in the alarm. The History alarm doesn't allow the acknowledgement, its purpose is simply to display historic data.
Pre-requisites:
- Configure the tag.
- Go to the navigation tree.
- Open the Tag document and select the tag that will be monitoring the alarms.
- Select the tag and open the properties window.
- Enable the alarms you want to manage, and configure its values and messages.
- Create a graphic screen and insert an alarm object.
- Change the type to Online.
- Add the tag to the alarm object and select the same alarms you configured for the tag to show in the alarm's object.
Configuration in Properties Window:
- Configure colors including the Alarm Activated (red), Normalized (blue) and acked (green)
- Alarm Type

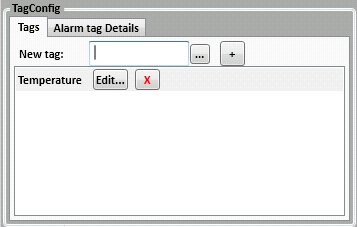
- Required to configure the tags:
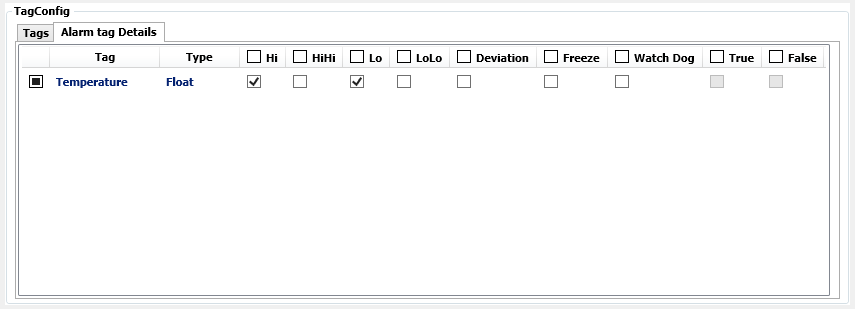
- The alarms for each tag configured:
b) History Alarm

Description:
The History Alarm allows the user to filter from a list of stored alarms and will be History if the Tag was configured in the Alarm Document.
The last state always disappears from the Alarm Object if it was Normalized and Acknowledged. If one of them was not done yet, the alarm will still be there.
The user can only acknowledge an alarm using the Online and double-clicking in the alarm. The History alarm doesn't allow the acknowledgement, its purpose is simply to display historic data.
Pre-requisites:
- Configure the tag.
- Go to the navigation tree.
- Open the Tag document and select the tag that will be monitoring the alarms.
- Select the tag and open the properties window.
- Enable the alarms you want to manage, and configure its values and messages.
- Create an alarm document and configure it.
- Go to the navigation tree.
- Right click in the Alarm node and click to Insert a new document.
- Insert a new alarm by clicking insert.
- Configure the tag (numeric or boolean) and select the same alarms that were configured in the Tags configuration in the previous step.
- Create a graphic screen and insert an alarm object.
- Change the type to History.
- Add the tag to the alarm object and select the same alarms you configured for the tag to show in the alarm's object.
Configuration in Properties Window:
- Configure colors including the Alarm Activated (red), Normalized (blue) and acked (green)

- Alarm Type

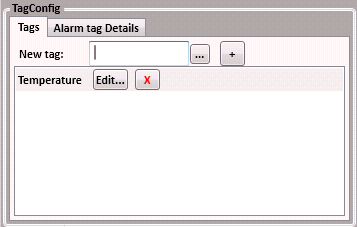
- Required to configure the tags:
- The alarms for each tag configured:

- Alarm Star Date configuration: (this configuration only exists with the History alarm or Event and History alarm)
This configuration must be done to capture the historic data. It allows the user to configure it in 2 different ways.
. Absolut

*Used more often to select history from a specific range in the past. If you want to allow the user in runtime to filter, you can use string or datetime tags in these fields and change its value during runtime.
. Relative

* If it is configured to use NOW , it means the EndDate is always now. And the start date, in this example it is 1 hour before now. As the current time NOW will be changing, the start date will change as well, bringing the history for the past hour.
c) Event Alarm

Description:
The Event Alarm only displays the events fired. Events are fired through SVEvent.
Pre-requisites:
- Create a graphic screen and insert an alarm object.
- Change the type to Event.
Configuration in Properties Window:
- Configure colors including the Alarm Activated (red), Normalized (blue) and acked (green)

- Alarm Type

- Filter events by Group: This configuration can set one or more filters
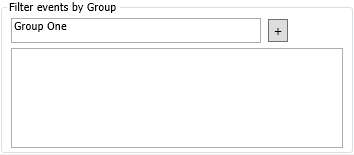
Adding a filter

In this case, the alarm object will only show events with the Group "Group One"
d) Event and History Alarm

Description:
The Event and History Alarm is a combination and have the same configurations of both history and event alarm.
Pre-requisites:
- Create a graphic screen and insert an alarm object.
- Change the type to Event and History.
Configuration in Properties Window:
- Configure colors including the Alarm Activated (red), Normalized (blue) and acked (green)

- Filter events by Group: This configuration can set one or more filters. In the Event and History alarm, it will show all alarms normally and will only filter the Events.

Example 1: Configuring an Online Alarm
There are some configurations needed in order to make the online alarm work. Follow the steps below:
1. Create a new Tag.
1.1. Name = Temperature
1.2. Type = Float

1.3. Go to the Properties Window and configure the alarm as following:
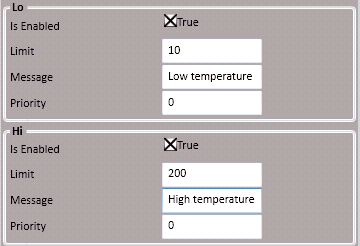
2. Next, create a Screen (Graphics).
3. Insert an Alarm Object into the Screen.
4. Select it and open the properties window.
5. Select the alarm Type = Online.

6. Locate the Alarm Configuration section and add the tag Temperature, typing its name and pressing ENTER.

7. The tag will be added to the list. Other tags can be added too.

8. Now, click the Alarm tag Details tab.
9. Select the type of alarms you want to see in the Alarm Object.
10. In this example, we want to see Hi and Lo. Select those.

11. At this time, run the application.
12. When it starts, it will trigger the Lo alarm as the value is 0 and lower than 10. Color blue is the default color for activated alarms, but it can be configured. At this point, the user can acknowledge the alarm by double-clicking it. Its' color will turn to green as in default configuration.
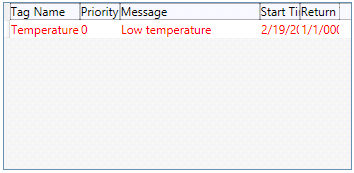
13. If you change the value to 20, the Alarm will now normalize. Color blue is the default color for normalization, but it can be configured. If it was already acknowledged in the previous step when it was red, the normalized alarm will disappear if it is online. If it is historic, it will be represented by the blue color.
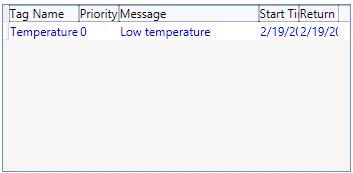
14. Now the user can acknowledge the alarm by double-clicking it. The alarm will disappear if it is online. If it is historic, it will be acknowledge by the green default color.
Example 2: Configuring a History and an Online Alarm
In this example, we will configure an Online Alarm and a History Alarm and we will run them both configured with the same tag. This is not necessary, but since the Online alarm is needed for acknowledgment, we will include it in this example.
1. Create a new Tag with the following configurations:
1.1. Name = Temperature
1.2. Type = Float

2. Go to the Properties Window and configure the alarms as following:
3. Next step is to create a screen (Graphics).
4. Insert an Alarm1 Object to the screen.
5. Select it and open the properties window.
6. Select the Alarm Type = Online

7. The Online Alarm configuration will be the same as the History configuration.
8. Insert the Alarm2 Object to the screen.
9. Select the Alarm Type = History

10. Locate the Alarm Configuration section and add the tag Temperature, inserting its name and pressing ENTER.

11. The tag will be added to the list. Other tags can be added too.

12. Now click in the Alarm tag Details tab.
13. Select the type of alarms you want to see in the Alarm Object.
14. In this example, we want to see Hi and Lo.

15. Now run the application.
16. When it starts, it will trigger Lo alarm as the value is 0 and lower than 10. Color blue is the default color for activated alarms, but it can be configured. At this point, the user can acknowledge the alarm by double-clicking it in the online alarm. Its color will turn to green as that is the default configuration.

17. If you changed it to 40, the Alarm will now normalize. Color blue is the default color for normalization, but it can be configured. In the alarm history object, we will now see when it was activated (red color) and when it was normalized (blue color).

18. Now acknowledge the Low Temperature alarm which was already normalized by double-clicking it and using an Online Alarm object. In the image below, the Online alarm is empty because the Temperature has been normalized (blue) and acknowledged (green). The history object shows the status changes. In this example, we used the Online alarm to ack the normalized Low Temperature in the previous step.

19. Force the "HI" alarm to trigger by changing the value 40 to 210. Now we have the HI alarm activated.

To create a new Alarm in the Graphics Document:
1. Click the "Alarm" button in the Ribbon.
2. Place the mouse pointer where you want to create the alarm.
3. Click to create the new alarm.

Property List:
Info
. Name
. Size
. Location
. ZIndex
Configuration
. ToolTip
Brush
. Line
. Event
Security
Functions
. .Ack
. .AckAll
. .SelectedLine
. .Filter
. .AddFilter()